本文基于 aosp android-14.0.0_r15 版本讲解。
# 引子
Android14 显示系统整体框架如下图所示:

平台原因,图片可能不清晰,原图可查看链接: https://boardmix.cn/app/share/CAE.CMLx1wwgASoQ0B16wuyfXo7xkFJzuXqbijAGQAE/hxtUlY
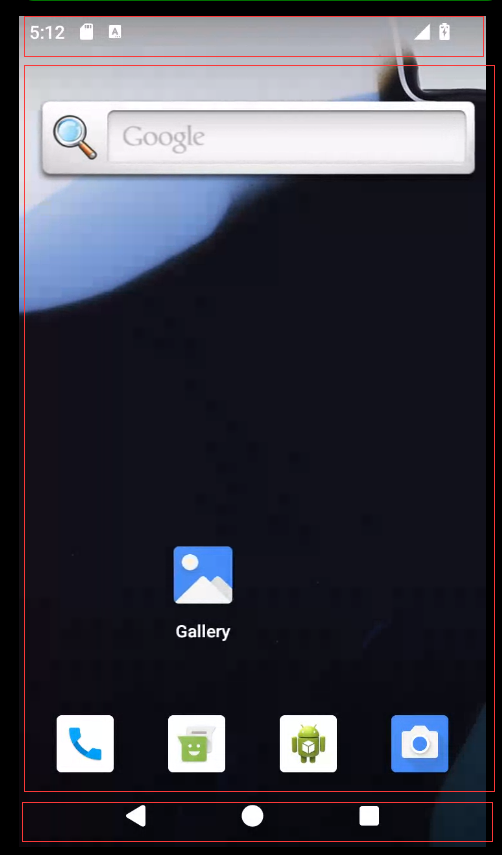
在 App 的角度,每一个图层就是一个 Window,Status Bar,Navigation Bar,WallPaper 以及各个图标,这些都是一个个 Window,WMS 对所有窗口的添加、层级、布局等进行统一管理

App 中 Add 一个 DecorView 时(DecorView 是一棵 View 树,用于承载 Window 中显示的具体内容),WMS 中会创建一个 WindowContainer(或者 WindowContainer 的子类)对象,WindowContainer 们通过树结构组织在一起。在 WMS 的角度 WindowContainer 就是一个图层。
在 WMS 中,每一个 WindowContainer 的构建过程中会创建一个与之对应的 SurfaceControl 对象,SurfaceControl 用于管理 Surface,我们可以认为一个 SurfaceControl 就代表一个 Surface。
在 WMS 中,创建 SurfaceControl 的时候,会向 SurfaceFlinger 发起 Binder 远程调用,SurfaceFlinger 进程中会创建一个与 SurfaceControl/Surface 相对应的 Layer 对象。Layer 在 SurfaceFlinger 进程中,用于表示一个图层。SurfaceControl 中有一个 handle 成员(Binder Bp 对象),通过这个 handle 可以索引到对应的 Layer 对象。
SurfaceControl/surface 的作用,主要是将 App 中的 View,WMS 中的 WindowContainer,还有 SurfaceFlinger 中的 Layer 几个对象关联起来。
当 WindowContainer SurfaceControl Layer 对象构建完成后,就会将 SurfaceControl 通过 Binder 返回给 App。App 拿到 SurfaceControl 之后,可以通过 SurfaceControl 获取到 Surface 对象。Surface 是帧缓存的实际持有者,通过 Canvas 对象对外提供绘制帧缓存的接口。当 App 刚拿到 Surface 时,内部还没有对应的帧缓存,会去创建一个 BLASTBufferQueue 对象,用于申请和提交帧缓存。每次要使用 Surface 的 Canvas 进行绘制前,需要先调用 dequeue 函数向 BLASTBufferQueue 申请一块内存(buffer),接着将 Canvas 绘制指令转换为图像数据并写入刚申请的内存中。这个向 BLASTBufferQueue 申请 Buffer 并写入图像数据的过程,可以认为是生产阶段。随后,向 BLASTBufferQueue 提交(enqueue) 这个 buffer,BLASTBufferQueue 将 buffer 提交给 SurfaceFlinger 去合成显示。这个阶段,可以理解为 Buffer 的消费阶段。
对于 Framework 这一层来说,显示系统我们主要关注以下几点:
- 图层类的创建与管理,所谓图层类就是代表了一个图层的类,主要有 Window/View WindowContainer SurfaceControl/Surface Layer
- 帧缓存的管理,Android12 以后,帧缓存由 App 端的 BLASTBufferQueue 管理
- 图形的渲染
- 帧缓存的合成
- VSync 信号驱动整个过程
# 显示简单图形的 Native App Demo
从上一节我们知道,一个 Activity 的显示通常会涉及到 APP WMS/AMS SurfaceFlinger 等多个进程,这给显示系统的学习增加了不少难度。
从学习的角度,我们可以暂时把 WMS/AMS 这部分 App 框架相关的内容先放一放,直接写一个与 SurfaceFlinger 交互的 Native 程序,让程序能显示简单的图形。搞定了 SurfaceFlinger 再来学习 App 框架那一套东西,这样可以极大地平缓显示系统的学习曲线。
接下来我们来完成一个简单的显示图像的 Native App Demo:
main.cpp:
#define LOG_TAG "DisplayDemo"

#include <binder/IPCThreadState.h>
#include <binder/ProcessState.h>
#include <binder/IServiceManager.h>
#include <hardware/gralloc.h>
#include <ui/GraphicBuffer.h>
#include <utils/Log.h>
#include <gui/BLASTBufferQueue.h>
#include <gui/IGraphicBufferProducer.h>
#include <gui/Surface.h>
#include <gui/SurfaceControl.h>
#include <system/window.h>
#include <utils/RefBase.h>
#include <android-base/properties.h>
#include <android/gui/ISurfaceComposerClient.h>
#include <gui/Surface.h>
#include <gui/SurfaceComposerClient.h>
#include <ui/DisplayState.h>


using namespace android;

bool mQuit = false;

/*
 Android 系统支持多种显示设备,比如说,输出到手机屏幕,或者通过WiFi 投射到电视屏幕。Android用 DisplayDevice 类来表示这样的设备。不是所有的 Layer 都会输出到所有的Display, 比如说,我们可以只将Video Layer投射到电视, 而非整个屏幕。LayerStack 就是为此设计,LayerStack 是一个Display 对象的一个数值, 而类Layer里成员State结构体也有成员变量mLayerStack, 只有两者的mLayerStack 值相同,Layer才会被输出到给该Display设备。所以LayerStack 决定了每个Display设备上可以显示的Layer数目。
 */
int mLayerStack = 0;

void fillRGBA8Buffer(uint8_t* img, int width, int height, int stride, int r, int g, int b) {
    for (int y = 0; y < height; y++) {
        for (int x = 0; x < width; x++) {
            uint8_t* pixel = img + (4 * (y*stride + x));
            pixel[0] = r;
            pixel[1] = g;
            pixel[2] = b;
            pixel[3] = 0;
        }
    }
}


int main(int argc, char ** argv) {

    // 建立 App 到 SurfaceFlinger 的 Binder 通信通道
    sp<SurfaceComposerClient> surfaceComposerClient = new SurfaceComposerClient;

    status_t err = surfaceComposerClient->initCheck();
    if (err != OK) {
        ALOGD("SurfaceComposerClient::initCheck error: %#x\n", err);
        return -1;
    }


    // 获取到显示设备的 ID
    // 返回的是一个 vector,因为存在多屏或者投屏等情况
    const std::vector<PhysicalDisplayId> ids = SurfaceComposerClient::getPhysicalDisplayIds();
    if (ids.empty()) {
        ALOGE("Failed to get ID for any displays\n");
        return -1;
    }

    //displayToken 是屏幕的索引
    sp<IBinder> displayToken = nullptr;

    // 示例仅考虑只有一个屏幕的情况
    displayToken = SurfaceComposerClient::getPhysicalDisplayToken(ids.front());

    // 获取屏幕相关参数
    ui::DisplayMode displayMode;
    err = SurfaceComposerClient::getActiveDisplayMode(displayToken, &displayMode);
    if (err != OK)
        return -1;


    ui::Size resolution = displayMode.resolution;
    //resolution = limitSurfaceSize(resolution.width, resolution.height);

    // 创建 SurfaceControl 对象
    // 会远程调用到 SurfaceFlinger 进程中,Surfaceflinger 中会创建一个 Layer 对象
    String8 name("displaydemo");
    sp<SurfaceControl> surfaceControl =
            surfaceComposerClient->createSurface(name, resolution.getWidth(),
                                                    resolution.getHeight(), PIXEL_FORMAT_RGBA_8888,
                                                    ISurfaceComposerClient::eFXSurfaceBufferState,/*parent*/ nullptr);


    // 构建事务对象并提交
    SurfaceComposerClient::Transaction{}
            .setLayer(surfaceControl, std::numeric_limits<int32_t>::max())
            .show(surfaceControl)
            .setBackgroundColor(surfaceControl, half3{0, 0, 0}, 1.0f, ui::Dataspace::UNKNOWN) // black background
            .setAlpha(surfaceControl, 1.0f)
            .setLayerStack(surfaceControl, ui::LayerStack::fromValue(mLayerStack))
            .apply();


    // 初始化一个 BLASTBufferQueue 对象,传入了前面获取到的 surfaceControl
    // BLASTBufferQueue 是帧缓存的大管家
    sp<BLASTBufferQueue> mBlastBufferQueue = new BLASTBufferQueue("DemoBLASTBufferQueue", surfaceControl ,
                                             resolution.getWidth(), resolution.getHeight(),
                                             PIXEL_FORMAT_RGBA_8888);

    // 获取到 GraphicBuffer 的生产者并完成初始化。
    sp<IGraphicBufferProducer> igbProducer;
    igbProducer = mBlastBufferQueue->getIGraphicBufferProducer();
    igbProducer->setMaxDequeuedBufferCount(2);
    IGraphicBufferProducer::QueueBufferOutput qbOutput;
    igbProducer->connect(new StubProducerListener, NATIVE_WINDOW_API_CPU, false, &qbOutput);

    while(!mQuit) {
        int slot;
        sp<Fence> fence;
        sp<GraphicBuffer> buf;

        // 向 gralloc HAL 发起 binder 远程调用,分配内存
        // 核心是 GraphicBuffer 的初始化,以及 GraphicBuffer 的跨进程传输
        // 1. dequeue buffer
        igbProducer->dequeueBuffer(&slot, &fence, resolution.getWidth(), resolution.getHeight(),
                                              PIXEL_FORMAT_RGBA_8888, GRALLOC_USAGE_SW_WRITE_OFTEN,
                                              nullptr, nullptr);
        igbProducer->requestBuffer(slot, &buf);

        int waitResult = fence->waitForever("dequeueBuffer_EmptyNative");
        if (waitResult != OK) {
            ALOGE("dequeueBuffer_EmptyNative: Fence::wait returned an error: %d", waitResult);
            break;
        }

        // 2. fill the buffer with color
        uint8_t* img = nullptr;
        err = buf->lock(GRALLOC_USAGE_SW_WRITE_OFTEN, (void**)(&img));
        if (err != NO_ERROR) {
            ALOGE("error: lock failed: %s (%d)", strerror(-err), -err);
            break;
        }
        int countFrame = 0;
        countFrame = (countFrame+1)%3;

        fillRGBA8Buffer(img, resolution.getWidth(), resolution.getHeight(), buf->getStride(),
                        countFrame == 0 ? 255 : 0,
                        countFrame == 1 ? 255 : 0,
                        countFrame == 2 ? 255 : 0);

        err = buf->unlock();
        if (err != NO_ERROR) {
            ALOGE("error: unlock failed: %s (%d)", strerror(-err), -err);
            break;
        }

        // 3. queue the buffer to display
        IGraphicBufferProducer::QueueBufferOutput qbOutput;
        IGraphicBufferProducer::QueueBufferInput input(systemTime(), true /* autotimestamp */,
                                                       HAL_DATASPACE_UNKNOWN, {},
                                                       NATIVE_WINDOW_SCALING_MODE_FREEZE, 0,
                                                       Fence::NO_FENCE);
        igbProducer->queueBuffer(slot, input, &qbOutput);

        sleep(1);
    }
    return 0;
}
2
3
4
5
6
7
8
9
10
11
12
13
14
15
16
17
18
19
20
21
22
23
24
25
26
27
28
29
30
31
32
33
34
35
36
37
38
39
40
41
42
43
44
45
46
47
48
49
50
51
52
53
54
55
56
57
58
59
60
61
62
63
64
65
66
67
68
69
70
71
72
73
74
75
76
77
78
79
80
81
82
83
84
85
86
87
88
89
90
91
92
93
94
95
96
97
98
99
100
101
102
103
104
105
106
107
108
109
110
111
112
113
114
115
116
117
118
119
120
121
122
123
124
125
126
127
128
129
130
131
132
133
134
135
136
137
138
139
140
141
142
143
144
145
146
147
148
149
150
151
152
153
154
155
156
157
158
159
160
161
162
163
对应的 Android.bp:
cc_defaults {
    name: "demo_defaults",

    cflags: [
        "-Wall",
        "-Werror",
        "-Wunused",
        "-Wunreachable-code",
    ],

    shared_libs: [
        "libbase",
        "libbinder",
        "libcutils",
        "liblog",
        "libutils",
        "libui",
        "libgui",
        "libEGL",
        "libGLESv1_CM",
    ],
}

cc_binary {
    name: "DispalyDemo",
    defaults: ["demo_defaults"],
    srcs: [
        "main.cpp",
    ],

    cflags: [
        "-Wno-deprecated-declarations",
        "-Wno-unused-parameter"
    ],
}
2
3
4
5
6
7
8
9
10
11
12
13
14
15
16
17
18
19
20
21
22
23
24
25
26
27
28
29
30
31
32
33
34
35
以上代码可以在手机上全屏显示一个纯色的图案。
// todo 整个示例程序的全流程示意图
代码中肯定有很多的疑惑,我们后面逐步分析,慢慢解开显示系统的神秘面纱。